Consulting Services
Siebel Consulting
Microsoft CRM Consulting
Actuate Consulting
IT Consulting
Web Site Development
Web Hosting Plans
Small Business Plan
Personal Plan
Business Plan
E-Business Plan
High-Volume Plan
Compare Plans
Hosting Details
Support
Order a WebSite
About Us
Contact Us
Customer
Login
Our latest Control Panel Software has been improved so that
it is easy-to-use and comprehensive.
Here is an index of the important
features included in your control panel:
Linux Based Systems (Since 2004) |
BSD Based Systems (old) |
What the Main Menu looks like |
What the Main Menu looks like |
Getting to the Control Panel (Linux Systems)
You can reach your control panel by entering:
![]()
Replace "your-domain.com" with your own domain name in your browser.
You can also use the IP address instead of your domain name to access your control panel! For example:
http://69.44.xxx.xxx/cpanel/
(If you are a brand new customer (less than 4-5 days), then using the IP Address is the ONLY way to access your control panel.)
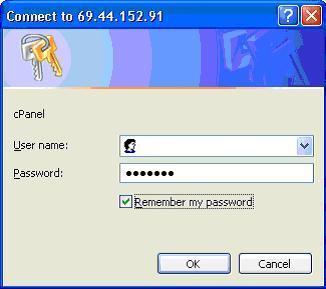
Password Prompt (Linux Systems)
At this point you will be prompted to log in to the control panel.
Enter your sites admin username including your domain name.
(username@hickmansystems.com)
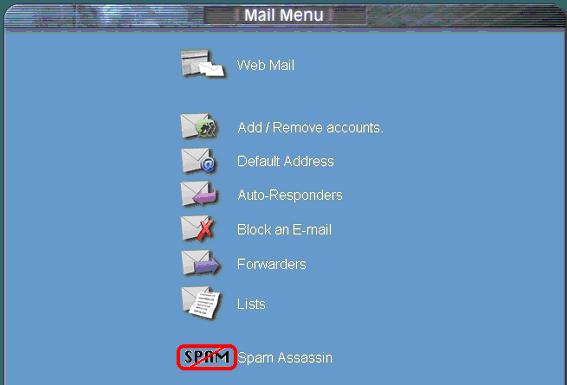
Main Menu/Toolbar (Linux Systems)

The Mail Menu choice from the CPanel toolbar allows you to create an UNLIMITED number of mailboxes (accounts), aliases, and forwarders as you need them. This easy to use interface makes mailbox additions, deletions, and modifications a breeze. Your new mailboxes and aliases are ready for use as soon as you enter them.
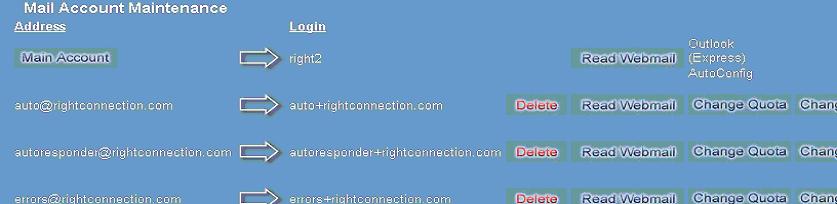
If you select the 'Add / Remove accounts' selection, you can manage your users mailboxes.
You can create new email accounts (mailboxes), delete them, set a quota (a limit on how big their mailboxes can be), read the email in a given mailbox using the web based email reader and reset users passwords.
One special feature that should be noted is the "Outlook (Express) AutoConfig" Button.
This button will allow you to easily set up (configure) outlook express on the end-user's computer.
This feature can save quite a bit of time when configuring your email accounts.
Email Client Setup:
(Does not apply if you setup your email to be aliased (forwarded) to an external email account you already check.)
Once you have created a mailbox using your site's control panel, then you need to configure your PC's email program to download mail from this newly created mailbox. The easiest method is the autoconfig button. If this does not work or does not pertain then please see the detailed instructions on how to setup your PC's email program in our Email Client Setup page.
Some other notes about the Mail Menu:
When adding an alias (a forwarder), make sure that a mailbox with the same name does not exist. If a mailbox exists with that the same name, you must delete the mailbox first.
-- Go to the TOP -- 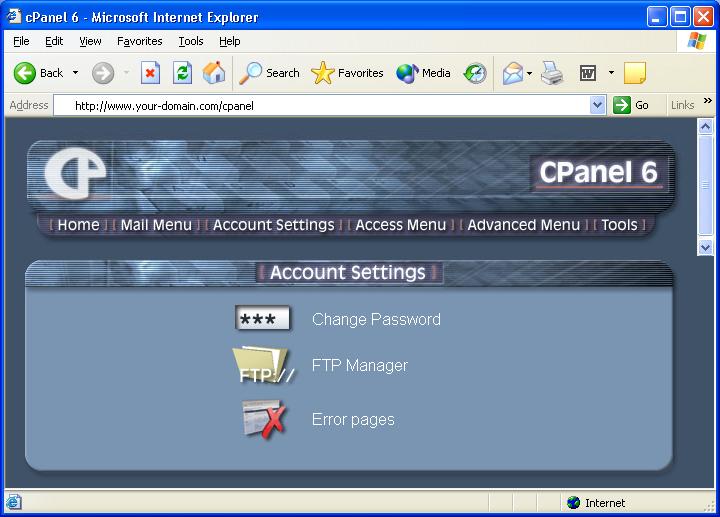
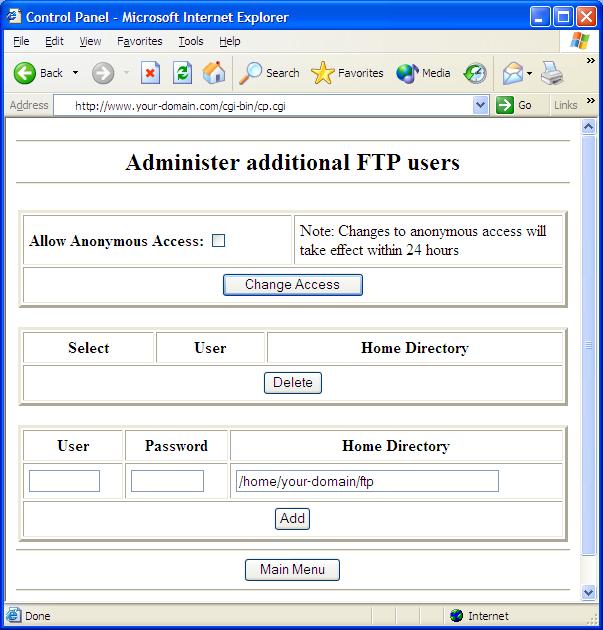
This menu allows you to change the main administrator password, manage the FTP accounts, and alter the error hanler pages.
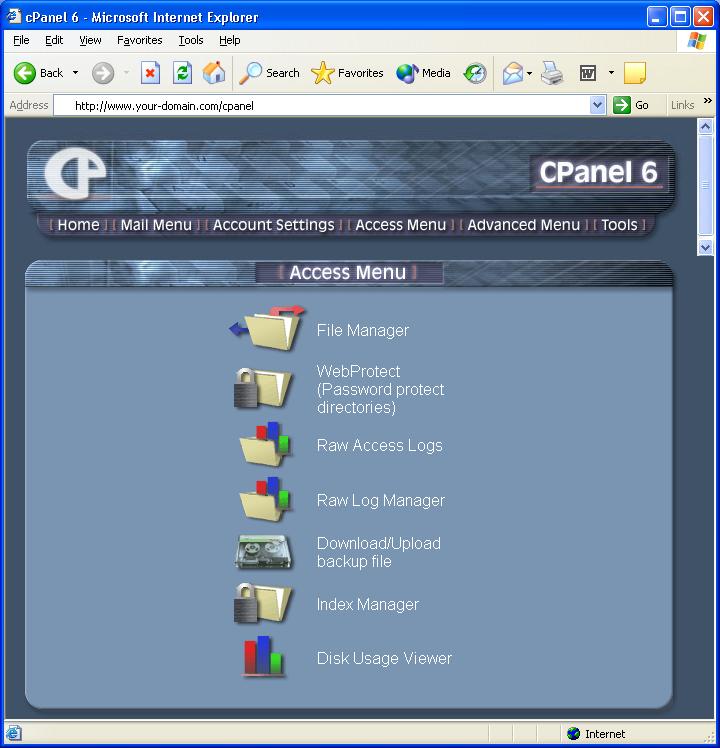
This menu allows you to access:
* File Manager - Manage the files on your site from your web browser, you can even upload files to your site.
* Web Protect - Add a basic level of security you specific directories on your site
* Raw Access Logs - See the access logs
* Raw Log Manager
* Download/Upload backup file - Mange the backups of your web site.
* Index Manager
* Disk Usage Viewer - Get details on how much room you site is using.
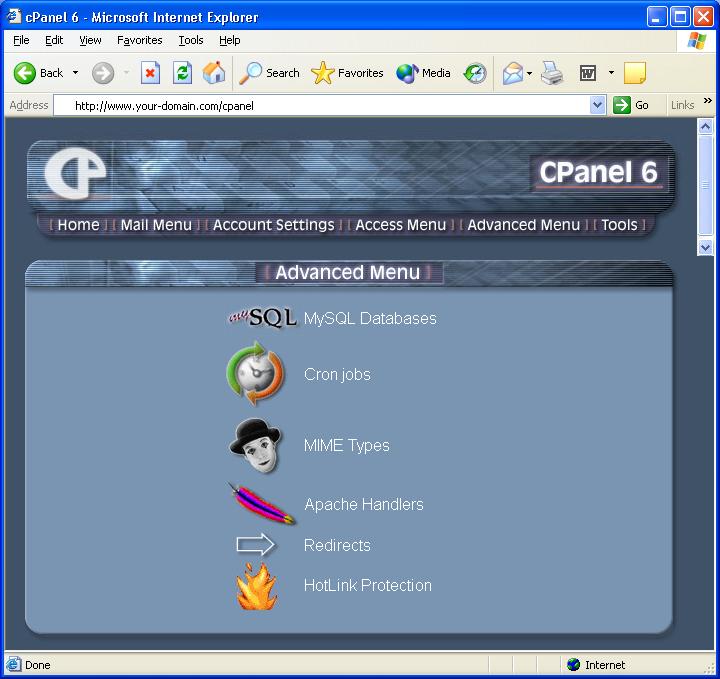
This menu allows you to contol:
* MySQL Databases - Create and manage a database to be used on your site.
* Cron Jobs - Set a program to run at a specified time
* MIME Types
* Apache Handlers
* Redirects
* HotLink Protection
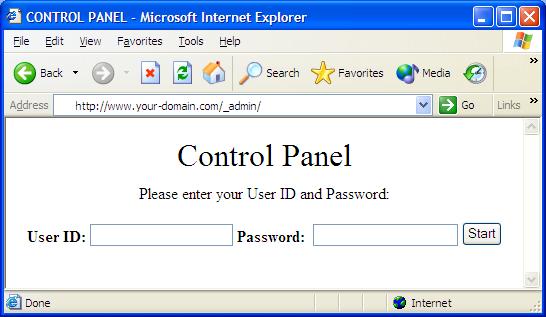
Getting to the Control Panel (BSD Systems)
You can reach your control panel by entering:
![]()
(That is an "underscore" character before the word "admin" and the final forward slash is Important.)
Replace yourdomain.com with your own domain name in your browser. You can also use your IP address instead of your domain name to access your control panel! For example:
http://66.253.xxx.xxx/_admin/
(If you are a brand new customer (less than 4-5 days), then
using the IP Address is the ONLY way to access your control panel.)
At this point you will be prompted to log in to the control panel.
A disk usage pie chart is also included. This graph will give you an easy way to view where and how much disk space you are using. The table breaks down the disk usage by category of files.
HTTP: All web site files which are kept underneath the /virtual_html directory.
LOGS: Web site log files which are kept underneath the /logs directory.
FTP: All web site ftp files which are kept underneath the /ftp directory.
MAIL: Any stored email which is kept underneath the /mail directory.
OTHER: All other files and directories stored in your home directory.
All values are in Kilobytes, and simply divide the value by 1024 to get the value in Megabytes.
Graphical displays of the your bandwidth usage for the past 24 hours (Daily) or the past 30 days (Monthly).
These bandwidth usage graphs are broken down into the following protocols: Total, HTTP, POP3, FTP, Telnet, and Other.
All values are in Kilobytes, and simply divide the value by 1024 to get the value in Megabytes.
Site logs are included in raw data form or displayed through Analog, a program that will display your hits in great detail. 24 hours worth of logs file entries are generated automatically every morning at 3:00AM EST and are appended to the existing log file for each site. If you choose, you have the option of deleting the log file and a fresh log will be generated automatically at the next 3:00AM cycle. For more information and documentation on how to read the reports that Analog generates, click here.
If Analog does not meet your logging needs, customers also have the option of signing up for WebTrends, a log analysis program that generates a much more detailed and graphical display of your site's traffic. See our pricing page for Webtrends setup costs where applicable.
-- Go to the TOP --POP3 E-Mail control allows you to enter an UNLIMITED number of aliases, and mailboxes as you need them. This easy to use interface makes mailbox additions, deletions, and modifications a breeze. Your new mailboxes and aliases are ready for use as soon as you enter them.
For quick instructions on how to create/modify aliases and mailboxes, read below:
To have all mail forwarded to an external email address:
1. Delete All mailboxes.
2. Delete All aliases except for the DEFAULT alias.
3. Change the DEFAULT alias to go to the full external email address.
When adding an alias, make sure that a mailbox with the same name does not exist. If a mailbox exists with that the same name, you must delete the mailbox first.
When adding an alias or a mailbox, you only need to put the user name portion of the email address in the first field. For example, if you wanted to add the mailbox, myuser@yourdomain.com, you only need to put in the word: myuser in the first field and then specify a password for that mailbox in the second field.
![]()
This also applies to aliases. For example, if you wanted
to add the alias, myuser@yourdomain.com going to auser@adomain.com, you
only need to put the word: myuser in the first field and then the entire
email address of where you want it forwarded to: auser@adomain.com in the
second field.
![]()
Email Client Setup:
(Does not apply if you setup your email to be aliased to an external email
account you already check.)
Once you have created a mailbox using your site's control panel, then you need to configure your PC's email program to download mail from this newly created mailbox. For detailed instructions on how to setup your PC's email program (Outlook, Netscape Mail, & Eudora), please see our Email Client Setup page.
Autoresponder Setup:
To Add an Autoresponder:
2a. Select the radio button for "Add" and select the mailbox from the drop down list that you want to add an autoresponder message to. Then hit the "Change" button.
3. On the next screen, you can change the From: and Subject: tags to reflect
the email address you want
the autoresponse email to come from and the subject you want the autoresponse
email to have. Make sure you only leave one space after the words "From:" and "Subject:".
Then type the body of the autoresponse message below and hit the "Change" button.
To Delete an Autoresponder:
2b. Select the radio button for "Delete" and select the mailbox from the drop down list that you want to delete an autoresponder message to. Then hit the "Change" button.
-- Go to the TOP --This options allows you to install, configure, and remove the free shopping cart included with your website.
For detailed instructions on how to configure your shopping cart once
it is installed, see this page:
Step By Step E-commerce Setup Page
a. 'System Password': is used for FTP and Telnet access.
b. 'Control Panel Password': is used to access your Control Panel.
c. 'POP3 Email Passwords': are used to access your mail.
d. 'FrontPage Publish Password': is used to publish to your website via
FrontPage.
e. 'Password Protected Web Directories': are used to control browser access
to subdirectories on your website.
In this section of the control panel, you can reset and synchronize your 'System Password' and your 'Control Panel Password' simultaneously.
If you want to change the other passwords listed above, follow these instructions:
a. To change your 'POP3 Email Passwords', go to the MAIL section of your
control panel and
you can do it there.
b. To change your 'FrontPage Publish Password', first change your System/Control
Panel
Password using this section of the Control Panel and then go to the FRONTPAGE
section of the
Control Panel and choose to reinstall the extensions.
c. To change your 'Password Protected Web Directories', go to the WEB
MANAGEMENT
section of your control panel and you can do it there.
Web Site controls include the ability to create password protected directories within your Web Site with UNLIMITED usernames and passwords. You can also read and delete files. This information is easily viewable from within the control panel.
Do not use this control panel option if you use Frontpage to publish your web site. Frontpage has it's own built in security (Tools Menu - Permissions) that you must use instead of using this Web Security option or risk corrupting your Frontpage extensions.
The only exception is when password protecting your /_webtrends directory (if you signed up for it) since no frontpage web pages are stored here.
a) Since web access all takes place in and underneath the /virtual_html directory, please select the /virtual_html directory and hit the "Change Directory" button.
b) Now select the subdirectory you want to password protect and hit the "Change Directory" button. In this example, we are trying to password protect the /advanced directory inside of /virtual_html. Always check the "Current Directory" information line to see what directory you are currently in.
c) Now that we are in the /advanced directory, click over on the right side and assign a realm name (for simplicity just use the name of the directory itself), a user name, and a password. Then, hit the "Add Protection" button. Then, the screen will refresh and you can continue adding more user names and passwords. After you have added your first user name, you will also be given an additional selection box that will allow you to delete an existing username that you have added previously (just select the user name on the list and hit the "Delete User" button if you wish to do so).
You can install or repair your site's FrontPage extensions using this option. The one button performs both functions. So, if your site has never had FrontPage extensions and you would like to install them or, if your site's FrontPage extensions have become corrupted, you can now perform these at any time.
When you install or repair your FrontPage extensions, your current control panel password is the one that is used. If you have just changed your password using the PASSWORD option in the control panel, then it will use the new password you just entered.
Error Management (BSD Systems)
With this control panel option, you can set up the standard server error messages to redirect to custom error html pages on your web site. For example, you may want the standard "404 Not Found" error to show a custom error page that you have designed, rather than the server default error message.
a) Follow the example below and replace "yourdomain.com" with your domain name and then upload your custom error html pages to your /virtual_html directory.
Notice that the 401 Error document must be specified with a relative path and you should type it in the way it is shown below. Upload that error page to the same location as the other error pages.
Check if your web site is still available.